

Acrylic Display Case Edge Finishing: A 2026 Guide
Table of Contents
- Why Edge Finishing Defines a Quality Acrylic Display Case
- How to Polish Acrylic Edges: A Step-by-Step Method
- Flame Polishing vs Diamond Polishing: Which Finish Wins?
- Preventing Acrylic Edge Crazing During Finishing
- Troubleshooting Common Edge Defects
- Tool Costs and Environmental Impact of Acrylic Finishing
- Frequently Asked Questions
Last Updated: September 13, 2026
Why Edge Finishing Defines a Quality Acrylic Display Case
Acrylic display case edge finishing is the process of cutting, sanding, polishing and bonding the edges of polymethyl methacrylate sheet so a case reads as one continuous piece of glass-clear material rather than a box of stacked panels, and acrylic display case edge finishing is what separates a bespoke-looking case from a cheap one. Get it right and the seams vanish. Get it wrong and every scratch, cloud patch and dull line stays visible for the life of the case.

At Acrylic Display uk, we have spent more than 30 years manufacturing acrylic displays in our own factory, and the difference between a case that looks bespoke and one that looks cheap almost never comes down to the sheet. It comes down to the edge.
Here is the part most guides skip: a rough edge is not just cosmetic. A poorly finished edge is a stress point. It is where crazing starts, where dust collects, and where a case eventually fails.
Below, we break down the full workflow, from wet sanding through to flame polishing, plus the defects that catch people out.
How to Polish Acrylic Edges: A Step-by-Step Method
Polishing acrylic edges is a three-stage process: flatten the cut edge with progressively finer abrasives, remove the scratch pattern left by each grit, then refine the surface until light passes through without scattering. Skipping a grit does not save time. It just moves the scratch deeper.
Wet Sanding Through the Grits
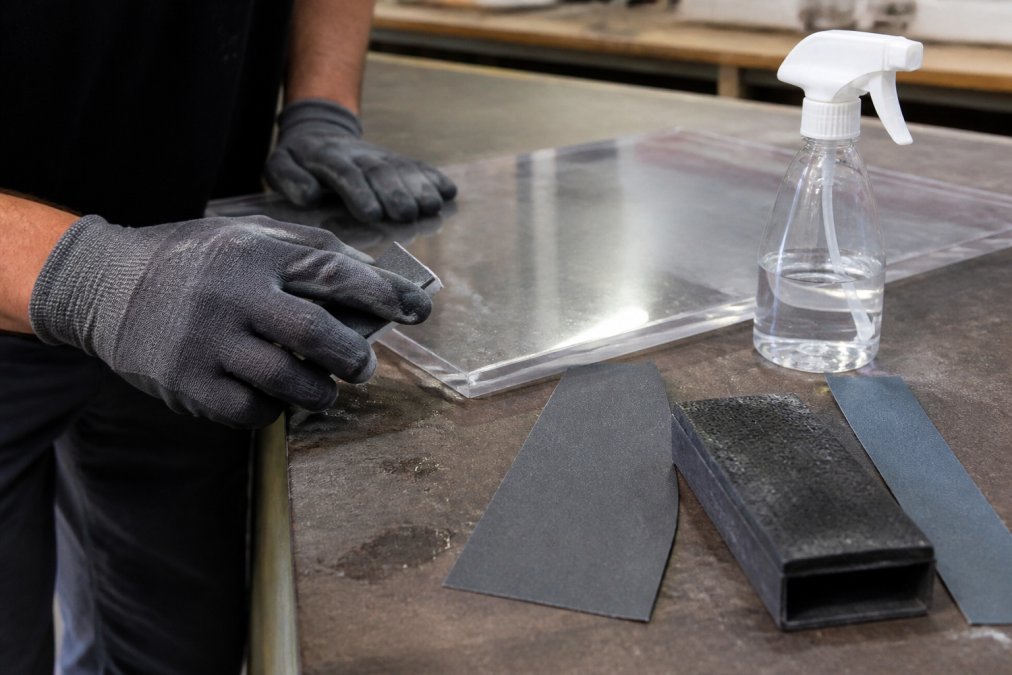
Wet sanding is the foundation, and it is where most DIY attempts fail. Dry sanding generates heat, and heat is what causes crazing in acrylic. Keep the surface flooded with water and work through the grits in order: 400, 600, 800, 1200, 1500, then 2000. Wrap the paper around a flat rubber block so the edge stays square. Ten to fifteen passes per grit, wiping the slurry away between stages, is enough if you started from a clean cut.
Buffing to a Water-Clear Seam
Buffing removes the final haze. Use a stitched cotton mop charged with a fine acrylic buffing compound, run at low speed, and keep the mop moving. The edge is finished when it matches the clarity of the face, a result often described as a water-clear seam. Over-buffing in one spot builds heat and dulls the surface, so short passes beat long ones.
Flame Polishing vs Diamond Polishing: Which Finish Wins?
Flame polishing produces the clearest edge in the shortest time, but it is unforgiving. A calibrated hydrogen-oxygen torch is passed quickly along the edge; surface tension melts the outer layer and it re-sets glass-clear. Move too slowly and the edge bubbles, warps or crazes. Diamond polishing, by contrast, uses a precision cutting tool to machine the edge flat before mechanical sanding and buffing take it to a shine.
The trade-off is straightforward: flame gives the best optical result on straight edges, while diamond-machined and mechanically polished edges hold tighter tolerances and survive handling better. For mitred joints, flame is usually the only way to hide the seam completely. For anything load-bearing or repeatedly handled, mechanical finishing wins.
What most guides leave out is how the two methods differ in practice, not just in principle. The table below sets out the variables that actually decide the finish.
| Variable | Flame polishing | Diamond / mechanical polishing |
|---|---|---|
| Heat source | Hydrogen-oxygen torch, small calibrated tip | Friction from abrasive and buffing mop |
| Typical edge speed | Fast, single continuous pass | Controlled by feed rate on the machine |
| Achievable clarity | Highest, glass-clear on straight edges | Very high, but can retain a faint directional grain |
| Dimensional accuracy | Low; the edge is melted, not cut | High; the edge is machined to size |
| Best joint type | Mitred joints, where the seam must disappear | Butt joints and load-bearing edges |
| Risk if rushed | Bubbling, warping, crazing | Rounded edges, uneven flats |
| Re-workability | Difficult once melted | Straightforward; re-sand and re-buff |
A few practical rules separate a good result from a ruined sheet. Flame polishing works best on edges that have already been cut clean and square, because the flame only refines what is there; it will not flatten a wavy cut. Keep the torch moving at a steady pace and let the surface tension do the work rather than holding the flame in one spot. Diamond-machined edges, by contrast, reward patience: run the cutter in light passes, then step through the same wet-sanding grits used elsewhere before buffing.
For a display case, the choice usually comes down to which edges will be seen. A mitred corner on a cube or plinth is almost always flame-polished, because the eye follows the seam and any mechanical grain shows. A shelf edge or a base that takes repeated handling is better diamond-machined and mechanically polished, because it will not craze under load and can be touched up later without re-cutting the sheet.

Preventing Acrylic Edge Crazing During Finishing
Crazing is the network of fine internal cracks that appears when acrylic is stressed beyond its tolerance, and it is almost always caused by heat or by solvent attack (pubmed.ncbi.nlm.nih.gov). Prevention comes down to three habits: keep cutting tools sharp so the sheet is not shocked, keep sanding wet, and never let a buffing mop dwell in one place.
Solvent welding is the other common trigger. Acrylic cement drawn into a joint by capillary action is what creates a strong chemical bond, but too much solvent, or solvent applied to an edge that still holds machining stress, invites crazing within days. Annealing the sheet before bonding, where the job allows it, releases that stress and dramatically reduces the risk.
Troubleshooting Common Edge Defects
Most edge defects trace back to one of four causes, and each has a specific fix. This is the section competitors tend to leave out, and it is where the real time savings sit.
| Defect | Likely Cause | Fix |
|---|---|---|
| Cloudy, hazy edge | Grit skipped during sanding | Re-sand from the previous grit, wet, then re-buff |
| Fine white scratches | Dry sanding or contaminated mop | Clean the mop, switch to wet sanding throughout |
| Bubbles or pitting | Torch moved too slowly, or damp edge | Re-machine the edge flat, flame in a single fast pass |
| Crazing near a joint | Excess solvent or trapped stress | Anneal before bonding, reduce cement volume |
| Uneven, rounded edge | Sanding by hand without a block | Use a flat block and a straight edge as a guide |
Square edges matter as much as shiny ones. Check alignment with an engineer's square before you polish, because once an edge is rounded it cannot be brought back without re-cutting the sheet. Edge deburring after cutting, even a light pass, removes the fine lip that otherwise catches the sandpaper and pulls it off line.
Tool Costs and Environmental Impact of Acrylic Finishing
Finishing costs scale with how much of the work you do yourself, and the biggest mistake beginners make is buying the wrong tier of tool for the volume they actually finish. The three tiers below are the ones that matter, and each has a clear break-even point.
Tier 1: hand finishing. A wet-sanding kit of abrasive sheets in six grits, a rubber sanding block, a spray bottle and a fine buffing compound is the lowest-cost entry point. It is slow, and it is hard to keep an edge perfectly square by hand, but for a single case or a one-off repair it is the sensible choice. Expect to spend tens of pounds rather than hundreds.
Tier 2: powered finishing. A variable-speed polisher with a stitched cotton mop, plus a bench-mounted router or trimmer for squaring edges, sits in the middle. This tier is where most small workshops land, because it removes the two biggest sources of error: uneven hand pressure and rounded edges. It is a few hundred pounds of outlay, and it pays back quickly if you finish more than a handful of cases a year.
Tier 3: production finishing. A hydrogen-oxygen flame polishing setup or a diamond edge-polishing machine is a genuine capital purchase, running into four figures. It only makes sense if edge quality is part of your product and you are finishing edges regularly rather than occasionally. The flame setup gives the best optical result; the diamond machine gives the best dimensional accuracy. Many professional shops own both and choose per job.
The cost-benefit calculation is simpler than it looks. If you are finishing one or two cases a year, pay someone who already owns the equipment. If edge quality is part of your product, own the tools and control the result. The break-even is usually measured in jobs, not years: once the tool cost is less than the difference between buying finished edges and making them, the decision makes itself.
On the environmental side, acrylic is a fully recyclable thermoplastic, and offcuts from precision cutting can be returned to the waste stream rather than binned. The practical steps that reduce waste during edge finishing are straightforward:
- Nest your cuts so offcuts are large enough to be reused for smaller components rather than becoming scrap.
- Keep grits separate and replace worn abrasive sheets rather than pressing on, because a worn sheet causes more rework and more wasted material.
- Remove masking film before recycling and dispose of it separately, as it is not the same material as the sheet.
- Handle solvent waste properly. Acrylic cement and its residues should not be rinsed down a drain; collect them for appropriate disposal.
For guidance on material handling and waste, see the Health and Safety Executive's guidance on hazardous substances.
If you would rather not finish edges yourself, the British Plastics Federation is a useful starting point for understanding material grades and supplier standards before you brief a manufacturer.
Frequently Asked Questions
How do I finish acrylic edges for a professional look?
Start by preparing the edge with a router or jointer for a square, straight profile. Then, progress through wet sanding with 400 to 2000 grit paper. For a water-clear finish, use a buffing wheel with a specialised compound or apply a flame polish. This multi-step process removes micro-scratches and creates a smooth, glass-like edge.
What is the difference between flame polishing and buffing acrylic?
Flame polishing uses a precise, high-temperature torch to melt the surface of the acrylic, creating a very clear finish quickly. Buffing is a mechanical process using a rotating wheel and compound to physically smooth the edge. Flame polishing carries a higher risk of crazing if overheated, while buffing is safer but more time-consuming.
Can you customize an acrylic display case?
Yes, bespoke manufacturing is a core service. Custom acrylic display cases can be produced to exact bespoke dimensions, with options for different acrylic thicknesses, mitred joints for a seamless look, and integrated features like locks. This ensures a perfect fit for high-value collectables or specific retail spaces.
Why are acrylic displays so expensive?
The cost reflects the material and extensive skilled labour. High-quality displays use premium acrylic sheet and require precise laser cutting, careful solvent welding for joint integrity, and a multi-stage edge finishing process. This craftsmanship ensures optical clarity, durability, and a museum-grade finish that cheaper alternatives cannot match.